0. 前言
这是对GAN应用到人脸合成的改进,只是在arxiv上,先看看再说。
- paper: https://arxiv.org/abs/1811.03492
- github: https://github.com/ESanchezLozano/GANnotation
- youtube: https://youtu.be/-8r7zexg4yg
key word: self-consistency loss, triple consistency loss, progressive image translation
1. Introduction
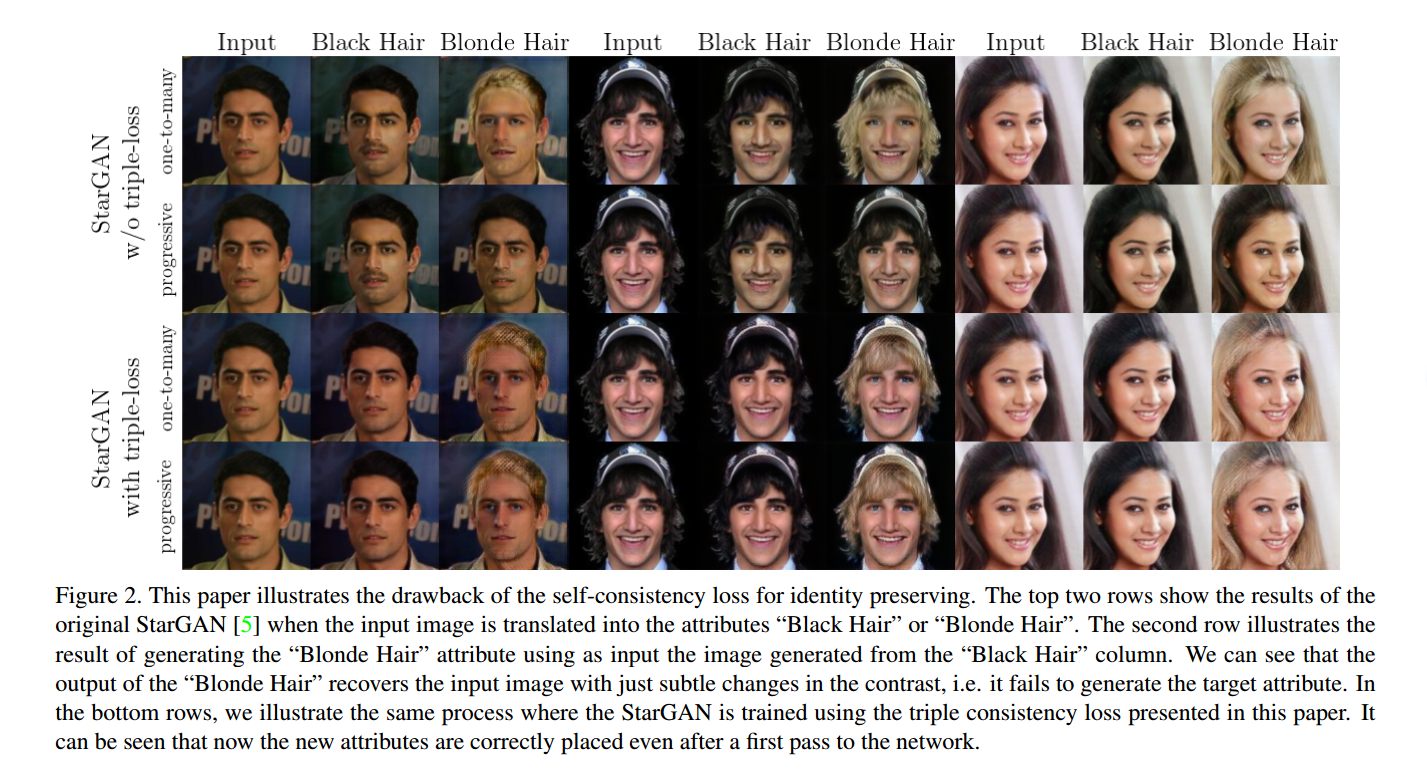
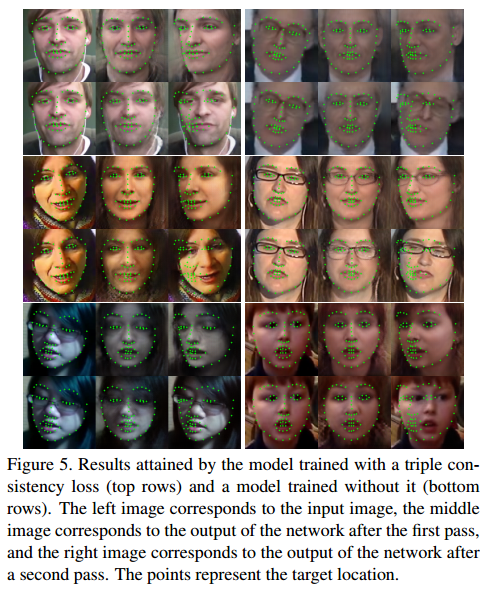
作者对 self-consistency loss 的有效性进行了论证, self-consistency loss 可以有效地使图片转换前后 preserve identity,并且提出了新的loss triple consistency loss.
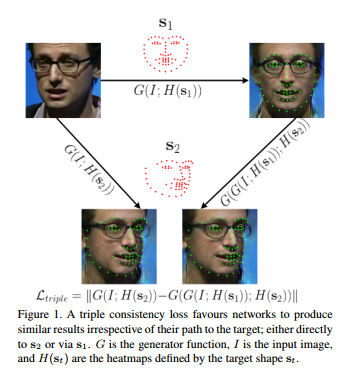

作者观察到当生成的图片再次经过生成另一种属性的图片时,生成的效果很差。记生成的图片再次经过网络生成新的图片的过程为 “progressive image translation”。比如输入一张图片a,先通过网络生成图片b,再将图片b送入网络,得到生成图片c。

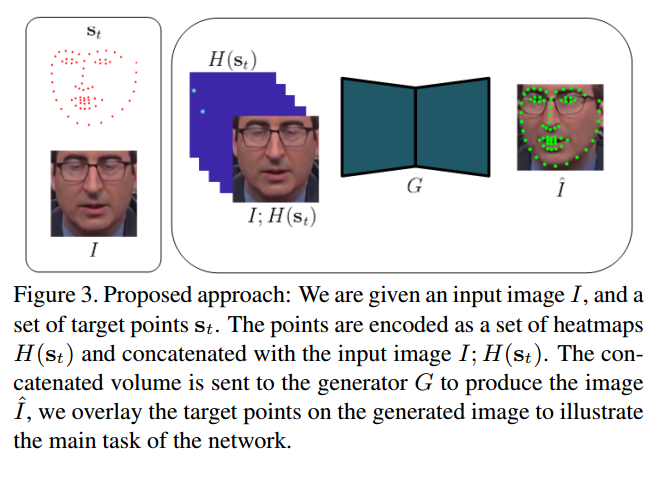
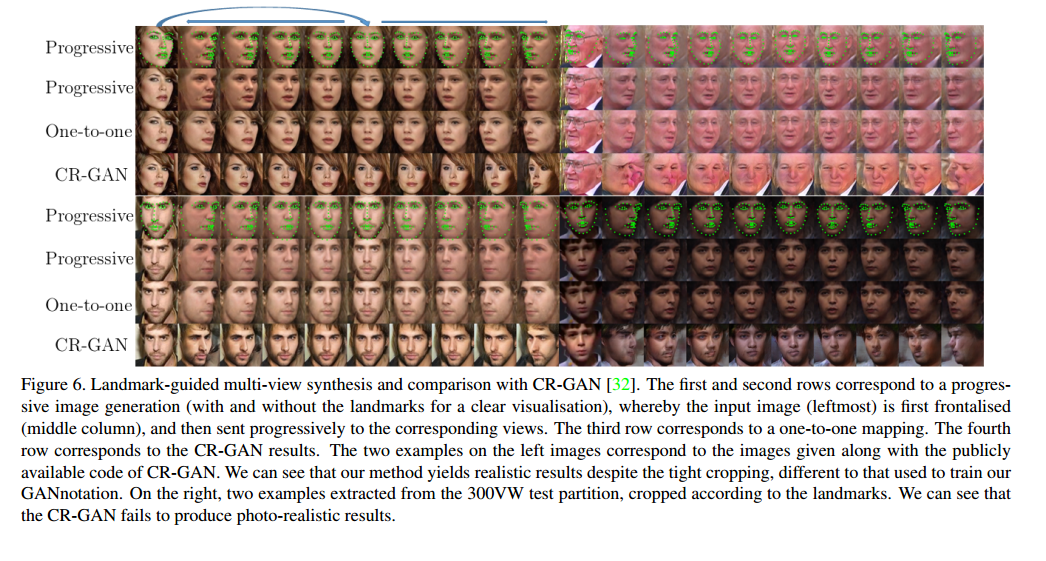
并且作者提出了GAN-notation,即 unconstrained landmark guided face-to-face synthesis, 同时改变人脸的姿势和表情(simultaneous change in pose and expression), 论证了 triple consistency loss 的有效性。
2. Proposed approach

2.1 Notation
符号说明:
| 符号 | 解释 |
|---|---|
| $I\in \mathcal{I}, w × h$ | 人脸图片$I$ |
| $s_i \in \mathbb{R}^{2n}$ | $n$个有序点的集合 |
| $H(s_t) \in \mathcal{H}, H(s_t) \in \mathbb{R}^{n×w×h}$ | $s_i$编码成 heatmap,以均值为点的高斯分布的形式呈现 |
| $G: \mathcal{I}×\mathcal{H} \to \hat{\mathcal{I}}$ | $\hat{\mathcal{I}}$是生成图片的集合 |
| $\hat{I} = G(I;H(s_t))$ | 其中$I$和$H(s_t)$是在通道维拼接而成的 |
| $\mathbb{P}_{\mathcal{I}}$ | 图片$I$的分布 |
| $\mathbb{P}_{\hat{\mathcal{I}}}$ | 图片$\hat{I}$的分布 |
2.2 Architecture
G:
- two spatial downsampling convolutions
- followed by a set of residual blocks
- two spatial upsampling blocks with 1=2 strided convolutions
- output: colour image $C$ and a mask $M$.
D: PatchGAN, 128×128—>4×4×512
2.3 Training
2.3.1 Adversarial loss
作者使用的是 hinge adversarial loss。
我在参考文献19中没有找到类似的loss,自己理解的是,对于判别器D而言,希望真图片的真值是$y \leqslant -1$,生成图片的真值是$y \geqslant 1$, 对于生成器G而言,希望生成的图片的真值是$y \geqslant 0$
2.3.2 Pixel loss
这个公式应该需要成对图片
2.3.3 Consistency loss
2.3.4 Triple Consistency loss
其中,$ \hat{I} = G(I;H(s_t)) $.
2.3.5 Identity preserving loss
其中,这个公式的目的是为了preserve the identity(???), 使用 Light CNN 的 fully connected layer 和 last pooling layer 提取出的特征。
不懂,为啥子呢?之前看StarGAN已经不使用这个公式了。
2.3.6 Perceptual loss
这个应该就是之前见过的Vgg提取特征做损失。
其中,$l=\lbrace relu1_2, relu2_2, relu3_3, relu4_3\rbrace$
感觉用到的损失太多了。
2.3.7 Full loss
其中,$\lambda{adv}=1, \lambda{pix}=10, \lambda{self}=100, \lambda{triple}=100, \lambda{id}=1, \lambda{pp}=10, \lambda_{tv}=10^{-4} $
在作者给的参考文献14中,也没有明确找到$L_{tv}$的表达式。之后看代码再确定一下吧。
3. Experiments
- Adam, $\beta_1=0.5, \beta_2=0.999$
3.1 On the use of a triple consistency loss
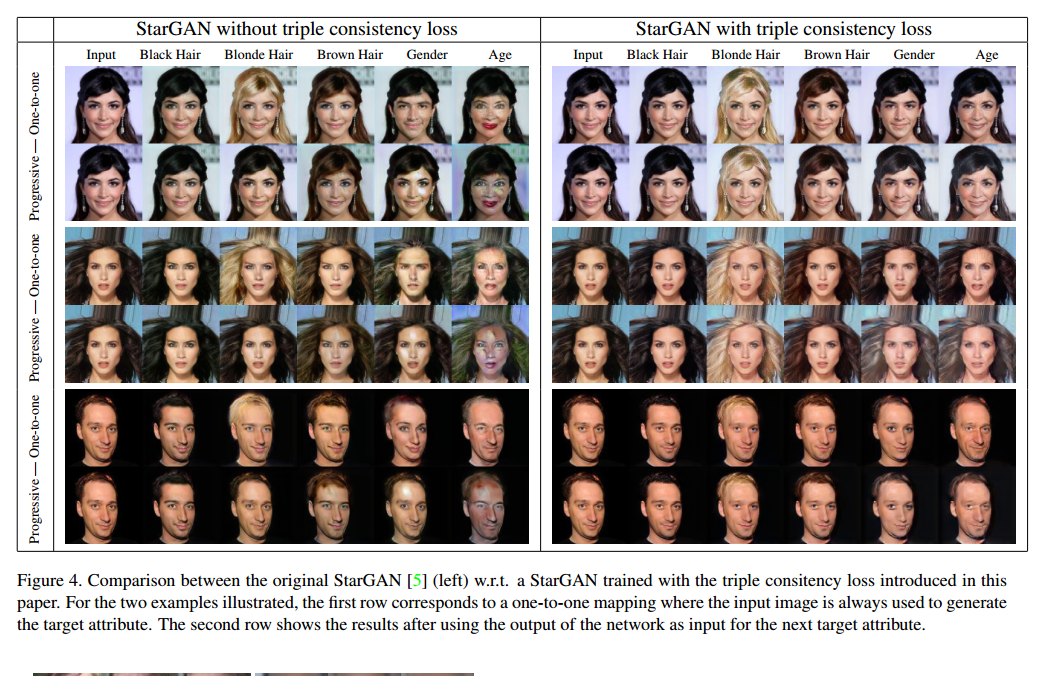

可以看到即使是 one-to-one , with triple consistency loss 的效果也要更好一些。
3.2 GANnotation
StarGAN只能对很粗的概念进行转换,但是GANnotation可以直接对比较细的属性pose进行转换,而且还可以连续变换,更厉害一些。


4. code
4.1 生成器G
生成器G输入是一张3通道的人脸图片和66通道的目标人脸关键点热力图,输出是3通道的colour image 和1通道的mask图。
生成器G共分为5部分:down_conv、bottleneck、feature_layer、colour_layer、mask_layer。
- [x] colour_image 和 mask 怎么理解?
1 | class Generator(nn.Module): |
初始化
1 |
|
np.loadtxt
1 | points = np.loadtxt('test_images/test_1.txt').transpose().reshape(66,2,-1) |
4.2 其他
作者现在只公布了demo代码。但不久就会公布训练代码,搓搓小手手期待中。
4.3 StarGAN-with-Triple-Consistency-Loss
1 | # Generate target domain labels randomly. |
5. 答疑解惑
5.1 colour_image 和 mask 怎么理解?
这个公式来源于
paper: Ganimation: Anatomically-aware facial animation from a single image
github: https://github.com/albertpumarola/GANimatio
project: http://www.albertpumarola.com/#projects
网络生成器没有直接回归整个图像,而是输出两个掩码,一个着色掩码C和一个注意力掩码A,其中,掩码A表示C的每个像素在多大程度上对输出图像有贡献,这样生成器就无需渲染与表情无关的元素,仅聚焦于定义了人脸表情的像素上。
这个公式貌似比StarGAN还牛逼。能不能放在StarGAN上呢?